I’ll never forget the first time I asked for a “blowout” at a salon and walked out looking absolutely nothing like the reference photo I’d shown. The stylist gave me a perfectly round, almost helmet-shaped look — and I spent the whole ride home trying to figure out what went wrong. Turns out I’d picked a style meant for thick, straight hair when I had fine, wavy strands that needed something totally different.
That experience sent me down a rabbit hole of blowout research, YouTube tutorials, and way too many hours with a Dyson Airwrap and a round brush. A few years (and a lot of trial and error) later, I’ve got a pretty solid handle on what works for what hair type — and more importantly, how to communicate what you actually want.
So whether you’re going to the salon or DIY-ing it at home, here’s an honest breakdown of 13 blowout hairstyles, and how to figure out which one is actually right for you.
First, What Even Makes a “Blowout” Different From Just Drying Your Hair?
Fair question. A blowout is basically a professional-level blow-dry that uses tension, heat, and technique to create volume, smoothness, or wave — depending on the style. It’s not just pointing a hairdryer at your head. The direction you pull the brush, the angle of the nozzle, the size of the round brush — all of it matters.
The good news: once you understand the style you’re going for, you can either book a stylist with confidence or replicate it at home with the right tools.
The 13 Blowout Styles (And Who They Actually Work For)
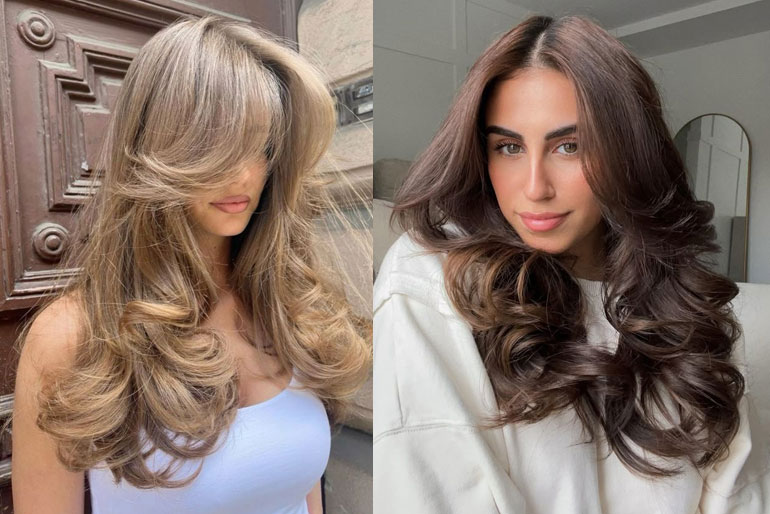
1. The Classic Voluminous Blowout
This is the one you see on red carpets — big, bouncy, full-bodied hair with a slight curve at the ends. Think: Old Hollywood but make it modern.
Who it works for: Medium to thick hair. Fine hair can pull it off with the right volumizing products (I swear by the Living Proof Full Dry Volume & Texture Spray), but it won’t hold as long.
Face shape: Almost universally flattering, but especially good for round and square faces because the added volume at the crown elongates your look.
Avoid it if: Your hair is extremely thin or prone to falling flat within an hour — unless you’re okay with a touch-up.
2. The Sleek and Straight Blowout
No waves, no curl — just pin-straight, glossy hair. This one takes the most skill to nail at home because even one slightly bent section shows up like a flag.
Best for: Naturally straight or slightly wavy hair. If you’re working with thick, coarse hair, a flat iron might be needed as a finish step.
Pro tip: Use a paddle brush (not a round brush) and pull in one downward direction. The Denman D3 brush is a solid choice and won’t break the bank.
The mistake I made: Trying this with damp (not just towel-dried) hair. The result? Frizzy, limp, and embarrassing. Hair needs to be about 80% dry before you start styling.
3. The Bouncy Curl Blowout
This is the blowout where your hair ends in gorgeous, loose curls — not ringlets, more like soft, voluminous bends. It’s salon-speak for “the Zendaya effect.”
Tools needed: A large round brush (at least 1.5 inches in diameter) and a concentrator nozzle on your dryer.
Works best on: Medium-length hair (collarbone to shoulder-blade). Too short and the curl doesn’t develop; too long and it gets heavy.
Reality check: This one is hard to DIY the first few times. I’d suggest watching a tutorial specifically for your hair length — Manes by Mell on YouTube is genuinely excellent for this.
4. The Bombshell Blowout
A step up from the classic volumous look — more dramatic, more retro, more “I just stepped off a photo shoot.” Think of it as classic blowout with extra body and a polished, intentional finish.
Who it’s for: Anyone with medium to thick hair who wants that golden-era Hollywood look. Works incredibly well for special events.
Product game: This is one style where a good thermal protectant and a setting spray both matter. I use the Kenra Platinum Silkening Mist before drying and Oribe Superfine Hair Spray to lock everything in.
5. The Beach Wave Blowout
Relaxed, effortless, a little undone — this is the blowout that’s supposed to look like you didn’t try. (It actually requires quite a bit of effort, which is very on-brand for “effortless” looks.)
The secret: Alternate the direction of your round brush as you section the hair. Some sections go under, some go over. This creates that inconsistent wave pattern that reads as “natural.”
Best for: Wavy hair types that just need to be enhanced rather than manipulated. Also great for people who want their blowout to last a few days without looking too polished on day two.
Skip this if: You have very fine hair — it can look limp rather than wavy. Go for the classic voluminous style instead.
6. The Blowout with a Middle Part
This is less about technique and more about the shape of the blowout. Parting in the middle completely changes the vibe — it’s more modern, more editorial, and works differently depending on your face shape.
Best for: Oval, heart, and diamond face shapes. Middle parts open up the face in a way that’s striking on certain bone structures.
Caution for: Round faces — a middle part can sometimes emphasize width. Side parts tend to be more elongating.
Styling note: Volume should go outward from the part on both sides rather than up — this gives that sleek-but-full look rather than a poofy effect.
7. The Side-Swept Blowout
One of my personal favorites. All the volume gets swept to one side, creating an asymmetrical look that’s polished without being stiff.
Great for: Fine to medium hair — sweeping everything to one side actually creates the illusion of more volume than you have.
Technique tip: Blow dry in the direction of the sweep from the very beginning. If you blow dry first and then try to flip it over, the style won’t hold as well.
8. The Sleek High-Volume Blowout
Think of this as the lovechild of the sleek straight blowout and the bombshell. The roots are lifted and full, but the rest of the hair is smooth and shiny — not curled.
Who it’s for: Thick hair types that want structure and polish without curl.
The tool that changed everything for me here: The GHD Helios hairdryer with its diffuser replaced by a concentrator. That concentrator nozzle gives you control that makes or breaks this style.
9. The Textured Blowout
This one deliberately avoids the polished finish. It’s the style you want when you’re going for that cool, effortless texture — almost like your hair air-dried but better.
Finish it with: A texturizing spray or a small amount of dry shampoo (yes, on clean hair — works as a texture agent) scrunched in at the ends.
Best for: Naturally wavy or curly hair that you’re loosening up rather than straightening out.
10. The Flip Blowout
Remember the flipped ends look from the ’90s and early 2000s? It’s back — but cleaner. This is where the ends of your hair curl outward rather than under, giving a playful, retro feel.
How to get it: Wrap hair around the round brush away from your face as you dry. Simple in theory; takes some arm coordination in practice.
Face shape note: The outward flip adds width at the jaw line, so it’s especially lovely for heart-shaped and oval faces.
11. The Curtain Bang Blowout
Technically this is about blowing out the bangs specifically — those wispy, face-framing pieces that split in the middle. The rest of the hair can be any style, but the curtain bang finish is its own skill.
The trick: Use a small, thin round brush and roll the bangs away from the center, toward each temple. A concentrator nozzle pointed downward keeps frizz at bay.
Why I messed this up initially: I tried to do the bangs last. Do them first, while you have the most patience and the hair is still perfectly damp.
12. The Natural-Looking Blowout
This is the style that looks like your hair just… does this on its own. It enhances your hair’s natural texture — whether that’s slight wave or soft body — without over-manipulating it.
Products: Less is more here. A light mousse applied to damp hair, then a diffuser attachment. For wavy or curly hair, this is genuinely the best of both worlds.
Ideal for: Anyone transitioning from heat-heavy styling who still wants a polished result without flattening out what their hair naturally does.
13. The Blowout with Accessories
Okay, hear me out — this isn’t technically a “style” in the pure blowout sense, but pairing a smooth or voluminous blowout with the right hair accessory completely transforms the final look. A claw clip on a voluminous blowout creates the “effortless updo.” A ribbon tied in a bow changes a basic bouncy blowout into something intentional and cute.
Why this matters: Accessories can extend your blowout’s life and make it look like a new style on day two or three. Hair ties, pins, and clips also help manage styles you couldn’t quite nail perfectly — nobody needs to know the back section didn’t cooperate.
How to Actually Choose the Right Blowout for You
Here’s the quick framework I use now (learned the hard way):
Step 1 — Know your hair texture. Fine, medium, thick? Straight, wavy, curly? Your texture limits and unlocks certain styles.
Step 2 — Consider your hair length. Curtain bang blowouts need bangs. Bouncy curl blowouts need at least chin length. Some styles fall flat (literally) on very short hair.
Step 3 — Think about your face shape. Round and square faces generally benefit from volume at the crown and less width at the sides. Oval faces are flexible. Heart shapes do well with volume at the jaw line.
Step 4 — Be honest about your skill level (or your stylist’s time). Some blowouts (like the sleek straight or the bombshell) require more precision and better products. If you’re DIY-ing at home for the first time, start with the beach wave or the natural-looking blowout — they’re more forgiving.
Step 5 — Bring a photo. I can’t stress this enough. Save a reference image and describe what you love about it (the volume? the smoothness? the shape at the ends?). That way a stylist can adapt it to your actual hair.
Common Mistakes That Ruin a Good Blowout
Starting with soaking wet hair. Let hair air-dry about 60–70% before you reach for the round brush.
Using too much product. One pump of serum is usually enough. More makes hair heavy and kills volume.
Moving too fast. Each section needs to be fully dry before you move to the next. Rushing this step is why blowouts fall within an hour.
Wrong brush size. Large round brushes create smooth waves; smaller ones create tighter curls. Matching brush to desired result matters more than most people think.
Not using a heat protectant. I know, I know. But skipping it is why hair gets brittle over time. It also helps the style hold better, so it’s genuinely not just a safety measure.
The Tools Worth Investing In
You don’t need everything at once. But if I had to pick essentials:
- A good hairdryer with a concentrator nozzle (Dyson Supersonic or GHD Helios if budget allows; Revlon’s 1875W is genuinely solid for the price)
- A large round brush for voluminous styles (Denman D5 or Ibiza round brushes)
- A small round brush for precision (curtain bangs, ends)
- A thermal protectant spray (not optional)
- Dry shampoo or a texturizing spray for finish and longevity
Final Thoughts
Blowouts get a reputation for being high-maintenance or salon-only territory, but once you know which style actually suits your hair and face, the whole process gets way less intimidating. The biggest shift for me was stopping trying to replicate styles that weren’t built for my hair type — and leaning into what my hair naturally wants to do with a little help from a good brush and a lot less rushing.
Pick one style from this list, gather one reference photo, and either book a consultation with your stylist or set aside thirty minutes at home to experiment. The first attempt probably won’t be perfect. The fifth one will surprise you.